Livery Creator Guide
1. Directory Structure
To ensure BeamNG recognizes your mod, you must create a specific folder hierarchy inside your Unpacked Mods folder.
└── vehicles/
└── [vehicle_internal_name]/
├── [skin_name].pc (Optional config)
└── [skin_name]/
├── materials.json
├── [vehicle].jbeam
└── [skin_name].dds (Your Texture)
Place your exported .dds file into the [skin_name] folder. If a
placeholder file already exists, delete/replace it. Ensure the filename matches
your code references exactly.
2. Required Code Files
Create these two text files inside your [skin_name] folder using a text editor like
Notepad++.
A. materials.json
This file tells the engine how to apply your texture to the car's 3D model.
{
  "[VEHICLE].skin.SKINNAME": {
    "name": "[VEHICLE].skin.SKINNAME",
    "mapTo": "[VEHICLE].skin.SKINNAME",
    "class": "Material",
    "Stages": [
      {
        "ambientOcclusionMap": "/vehicles/common/[VEHICLE]/[VEHICLE]_main_ao.data.png",
        "baseColorMap": "/vehicles/common/[VEHICLE]/[VEHICLE]_main_b.color.png",
        "metallicMap": "/vehicles/common/[VEHICLE]/[VEHICLE]_main_m.data.png",
        "metallicFactor": 1,
        "normalMap": "vehicles/common/[VEHICLE]/[VEHICLE]_n.dds",
        "roughnessMap": "/vehicles/common/[VEHICLE]/[VEHICLE]_main_r.data.png",
        "useAnisotropic": true
      },
      {
        "ambientOcclusionMap": "/vehicles/common/[VEHICLE]/[VEHICLE]_main_ao.data.png",
        "useAnisotropic": true,
        "diffuseMapUseUV": 1,
        "clearCoatFactor": 1,
        "clearCoatRoughnessFactor": 0.05,
        "metallicFactor": 0.5,
        "clearCoatMap": "/vehicles/common/[VEHICLE]/[VEHICLE]_main_cc.data.png",
        "normalMap": "/vehicles/common/[VEHICLE]/[VEHICLE]_n.dds",
        "opacityMap": "/vehicles/[VEHICLE]/[VEHICLE]_skin_o.data.png",
        "baseColorMap": "vehicles/[VEHICLE]/SKINNAME/[VEHICLE]_skin_SKINNAME.dds"
      },
      {},
      {}
    ],
    "activeLayers": 2,
    "dynamicCubemap": true,
    "materialTag0": "beamng",
    "materialTag1": "vehicle",
    "version": 1.5
  }
}
B. [vehicle_name].jbeam
This registers your skin in the Part Selector menu.
{
  "[VEHICLE]_skin_SKINNAME": {
    "information": {
      "authors": "Your Name",
      "name": "My Custom Skin",
      "value": 200
    },
    "slotType": "paint_design",
    "globalSkin": "SKINNAME"
  }
}
Advanced Editor: Photopea
For complex masking or advanced layer effects, we recommend using Photopea. It is a professional-grade editor that runs directly in your browser.
⚡ Quick & Cloud-Based
No install required. Full Photoshop UI in your browser. Perfect for rapid masking.
🎨 Pro Tools
Advanced brushes, full layer support, and industry-standard DDS export settings.
Troubleshooting: Format Errors
If you see an error saying a Template or Skin is unsupported, it's likely using BC7 (DX10) compression.
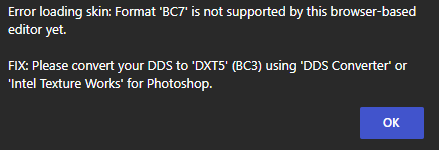
Common "Unsupported Format" system alert.
Why BC7 is Blocked
Modern vehicles use BC7 compression to save space, but it's too complex for browser-based tool decoding. Use these supported formats instead:
How to Fix: Convert to DXT5
Convert your BC7 templates before loading them into this tool:
Method 1: Photopea
- Open BC7 file in Photopea.
- Go to File > Export As > More > DDS.
- Select DXT5 and click Save.
Method 2: Standalone
Use ddsconverter.com for batching.
Or the Intel Texture Works plugin for Photoshop.
Affected Vehicles
The following vehicles use BC7 templates and require conversion: